

- Software Engineer, Product
- Modern Technology stacks:
- So What is a Tech Stack?
- Frontend tech stack
- Backend tech stack
- How to choose/build a tech stack
- What is a CI/CD Pipeline?
- Software Business Analyst
- Node.js Express Back-end Overview
- Build React App With Java Backend
- Connecting React-Frontend and NodeJS/Express Backend Applications
- React-Frontend, Node.js/Express-Backend, MySQL Architecture
- React Frontend with a NodeJS/Express Backend SQL-Architecture
- So What is git ?
- Git vs GitHub
- Big O Notation


- We will fetch the data from the backend and show it in our React app
How to connect a React Frontend with a NodeJS/Express Backend
Client-Server Architecture.

React-Fronend + NodeJS/Express Backend
How To Develop and Build React App With Express Backend
There are so many ways we can build React apps and ship for production. One way is to build React with NodeJS or Java and another way is to build the React and serve that static content with NGINX web server.
Here, we will see the details and implementation with React-Fronend + NodeJS/Express Backend. We will go through step by step with an example.
React is a javascript library for building web apps and it doesn't load itself in the browser. We need some kind of mechanism that loads the index.html (single page) of React with all the dependencies(CSS and js files) in the browser. In this case, we are using NodeJS/Express Backend as the webserver which loads React assets and accepts any API calls from the React app.
 Although, the port of the express server is important to note down, it doesn't really matter what port you run React. Now, before we make requests to the backend, let's set up the server code. We need to do npm install express body-parser which installs the "body-parser" package that is crucial for handling post requests. Body parser is a middleware, so we would add this to incorporate it..
 In this snippet, I also added a home route with app.get and returned a JSON object for any request made to it, so that later on, we can get the data inside of React
Moving on, your backend and frontend won't be able to connect to each other unless both are being run, so run npm run start and node server.js in the terminal throughout the development process to make sure that your proxies to the backend can be received. Once those two are runnning, you can use the useEffect hook in React to make a GET request to the server at any listed route.
In this snippet, I also added a home route with app.get and returned a JSON object for any request made to it, so that later on, we can get the data inside of React
Moving on, your backend and frontend won't be able to connect to each other unless both are being run, so run npm run start and node server.js in the terminal throughout the development process to make sure that your proxies to the backend can be received. Once those two are runnning, you can use the useEffect hook in React to make a GET request to the server at any listed route.
 This will return an object with the data that you supplied in the server and since fetch returns a promise, you can attach .then to finally get that data. But remember to add res.json() in your express code for the data being sent down to the client-side because it allows for you to handle the data like a Javascript object
Now that you know how to get data from Express in React, let's find out how we can also post data, such as form information that needs to be added to a database, and utilize that data in Express.
To make a POST request, we need to set up a route to listen for post data in the server by using app.post. Since we set up the body-parser middleware already, any data that is posted to this route is accessible in req.body
This will return an object with the data that you supplied in the server and since fetch returns a promise, you can attach .then to finally get that data. But remember to add res.json() in your express code for the data being sent down to the client-side because it allows for you to handle the data like a Javascript object
Now that you know how to get data from Express in React, let's find out how we can also post data, such as form information that needs to be added to a database, and utilize that data in Express.
To make a POST request, we need to set up a route to listen for post data in the server by using app.post. Since we set up the body-parser middleware already, any data that is posted to this route is accessible in req.body
 Moving to React, we need to make another fetch call with useEffect, but this time, it needs some headers that tell the server how to interpret the request (it will interpret it as JSON in this case), and we need a body that supplies the data. Once we handle the promise, we can log out our data to the console to see if it works. Keep in mind that our fetch request can just have the end of the route (/home) because of the proxy that we specified in the package.json

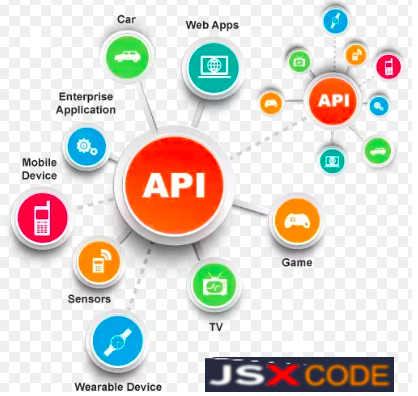
 What the Heck is API and API Integration ?
API (Application Programming Interface) is a piece of software that enables data exchange between applications and devices., as well as facilitate connectivity between devices and programs.
API can also be defined as an interface that allows an enterprise application to communicate with backend systems, promotes seamless communication between multiple applications, and exposes only a limited amount of the internal functions of a program.
What the Heck is API and API Integration ?
API (Application Programming Interface) is a piece of software that enables data exchange between applications and devices., as well as facilitate connectivity between devices and programs.
API can also be defined as an interface that allows an enterprise application to communicate with backend systems, promotes seamless communication between multiple applications, and exposes only a limited amount of the internal functions of a program.
 An API call is the process of a client application submitting a request to an API and that API retrieving the requested data from the external server or program and delivering it back to the client.
Let's say your app uses Facebook APIs to extract data and functionality from the platform. In that case, when broadcasting a live Facebook video stream, creating a post, or building a custom dashboard for your ads, you are actually making an API call.
Now that we understand what an API call is, let’s break down the process of making one.
An API call is the process of a client application submitting a request to an API and that API retrieving the requested data from the external server or program and delivering it back to the client.
Let's say your app uses Facebook APIs to extract data and functionality from the platform. In that case, when broadcasting a live Facebook video stream, creating a post, or building a custom dashboard for your ads, you are actually making an API call.
Now that we understand what an API call is, let’s break down the process of making one.
 * Find the URI of the external server or program.
* Add an HTTP verb.
* Include a header.
* Include an API key or access token.
* Wait for the response.
Add an HTTP verb.
Once you have the URI, then you need to know how to formulate the request.
The first thing you need to include is a request verb. The four most basic request verbs are:
* GET: To retrieve a resource
* POST: To create a new resource
* PUT: To edit or update an existing resource
* DELETE: To delete a resource
For example, let's say you use NREL's Alternative Fuel Station's API and want to see a list of the nearest alternative fuel stations in Denver, Colorado. Then you'd make a GET request that might look like:
* Find the URI of the external server or program.
* Add an HTTP verb.
* Include a header.
* Include an API key or access token.
* Wait for the response.
Add an HTTP verb.
Once you have the URI, then you need to know how to formulate the request.
The first thing you need to include is a request verb. The four most basic request verbs are:
* GET: To retrieve a resource
* POST: To create a new resource
* PUT: To edit or update an existing resource
* DELETE: To delete a resource
For example, let's say you use NREL's Alternative Fuel Station's API and want to see a list of the nearest alternative fuel stations in Denver, Colorado. Then you'd make a GET request that might look like:
2XX Codes
These codes convey that the server has received the client's request and processed it successfully.
Here are the most common examples:
4XX Codes
These codes convey that the client's request has an error. It's possible that the request is written incorrectly, or the resource which the client is requesting doesn't exist.
* 400 Bad Request: There is something wrong in the client's request.
* 401 Unauthorized: The client is not authorized to make this request.
* 403 Forbidden: The request is correct but can't be processed. Likely, the problem is that the client does not have required permissions.
* 404 Not Found: The resource being requested doesn't exist
Conclusion
There you have it! In summary, connecting a React frontend to an Express backend is simple. It just requires you to fetch data from the port that the backend server is located on. I didn't cover PUT or DELETE requests, but those are very similar to POST requests, so you can learn how to do those very easily with the knowledge I gave above. And I really recommend learning the MERN stack if you're not sure what full stack development stack to choose because MERN is extremely powerful once you learn how to connect React with Express. Anyways, thanks for reading.
Introduction
React is a javascript library for building web apps and it doesn't load itself in the browser. We need some kind of mechanism that loads the index.html (single page) of React with all the dependencies(CSS and js files) in the browser. In this case, we are using NodeJS/Express Backend as the webserver which loads React assets and accepts any API calls from the React app.
Making GET and POST Requests
Thus, to connect a React frontend with a NodeJS backend, we need to utilize the useEffect hook and the async function fetch(). useEffect will allow us to only run our fetch request once (when the component gets mounted) which will avoid slowing down our app. Since fetch allows us to make GET and POST requests, we can make requests directly to our server to get data. But how will this work? First of all, we need to do some configuration so that our react code can make fetch requests to the backend. We need to first create a package.json file and add a start script for both the frontend and backend code. For react, you can use npm run start in the terminal and for NodeJS, you can use npm run serverStart after adding node server.js to the package.json as shown below (if your main server file is called server.js). You will also need to add a "proxy" key to your package.json that redirects fetch requests to the server port. So, if your NodeJS server is running on port 3000, you would add this: Create a project directory and navigate to it using our Command Prompt/Terminal.
mkdir myproject
cd myproject
Although, the port of the express server is important to note down, it doesn't really matter what port you run React. Now, before we make requests to the backend, let's set up the server code. We need to do npm install express body-parser which installs the "body-parser" package that is crucial for handling post requests. Body parser is a middleware, so we would add this to incorporate it..
In this snippet, I also added a home route with app.get and returned a JSON object for any request made to it, so that later on, we can get the data inside of React
Moving on, your backend and frontend won't be able to connect to each other unless both are being run, so run npm run start and node server.js in the terminal throughout the development process to make sure that your proxies to the backend can be received. Once those two are runnning, you can use the useEffect hook in React to make a GET request to the server at any listed route.
This will return an object with the data that you supplied in the server and since fetch returns a promise, you can attach .then to finally get that data. But remember to add res.json() in your express code for the data being sent down to the client-side because it allows for you to handle the data like a Javascript object
Now that you know how to get data from Express in React, let's find out how we can also post data, such as form information that needs to be added to a database, and utilize that data in Express.
To make a POST request, we need to set up a route to listen for post data in the server by using app.post. Since we set up the body-parser middleware already, any data that is posted to this route is accessible in req.body
Moving to React, we need to make another fetch call with useEffect, but this time, it needs some headers that tell the server how to interpret the request (it will interpret it as JSON in this case), and we need a body that supplies the data. Once we handle the promise, we can log out our data to the console to see if it works. Keep in mind that our fetch request can just have the end of the route (/home) because of the proxy that we specified in the package.json
What the Heck is API and API Integration ?
API (Application Programming Interface) is a piece of software that enables data exchange between applications and devices., as well as facilitate connectivity between devices and programs.
API can also be defined as an interface that allows an enterprise application to communicate with backend systems, promotes seamless communication between multiple applications, and exposes only a limited amount of the internal functions of a program.
An API call is the process of a client application submitting a request to an API and that API retrieving the requested data from the external server or program and delivering it back to the client.
Let's say your app uses Facebook APIs to extract data and functionality from the platform. In that case, when broadcasting a live Facebook video stream, creating a post, or building a custom dashboard for your ads, you are actually making an API call.
Now that we understand what an API call is, let’s break down the process of making one.
* Find the URI of the external server or program.
* Add an HTTP verb.
* Include a header.
* Include an API key or access token.
* Wait for the response.
Add an HTTP verb.
Once you have the URI, then you need to know how to formulate the request.
The first thing you need to include is a request verb. The four most basic request verbs are:
* GET: To retrieve a resource
* POST: To create a new resource
* PUT: To edit or update an existing resource
* DELETE: To delete a resource
For example, let's say you use NREL's Alternative Fuel Station's API and want to see a list of the nearest alternative fuel stations in Denver, Colorado. Then you'd make a GET request that might look like:
GET https://developer.nrel.gov/api/alt-fuel-stations/v1/nearest.json?api_key=XXXXXXXXX&location=San Francisco+CO
This tells the server to search the database to find a list of alternative fuel stations in San Francisco. If that list exists, the server will send back a copy of that resource in XML or JSON and an HTTP response code of 200 (OK). If that list doesn't, then it will send back the HTTP response code 404 (not found).
Include a header.
The next thing you need to include is a header, which tells the API about your request and the response you're expecting. Including a header ensures the API understands what you're asking and responds in a way that's expected and easy for you to understand and use. Three common headers are user-agent, content-type, and accept. Let's define each below.
User-Agent
This header enables servers to identify the application, operating system, vendor, and/or version of the user agent making the request.
For example, let's say you want your application to work with New Relic's RESTful APIs. Then you need an HTTP agent to manage the information exchange between your application and New Relic and you need to identify that integration. In that case, you'd submit the following user-agent header in Java using the GET verb:
get.setHeader("User-Agent", "my-integration/1.2.3");
Content-Type
This header explains what type of information is in the body of the request. It might explain that the request was formatted in XML, for example, or JSON. Without this header, the API might receive your request and not understand what it is or how to decode it. As a result, you won't get a response.
Accept
This header explains what format you'd like to receive your response back from the API. Without this header, the API could return the data requested in XML when you wanted it in JSON, or vice versa.
It's important to note that an API might not be capable of returning data in the format you requested. That might be frustrating but you'll still receive a response. So you should always include this header in your API call in case you can get the exact response you want.
Include an API key or access token.
An API key and access token serve the same purpose: they are unique identifiers used to authenticate calls to an API. Made up of a string of letters and numbers that identify the client application making the request, an API key or access token is used to grant or deny requests based on the client's access permissions, and track the number of requests made for usage and billing purposes.
To make an API call to Google's Cloud Natural Language API, you must include an API key as a query parameter. For example, let's say you want to find named entities (ie. proper names and common nouns) in a body of text. Then you'd make the following API request, replacing API_KEY with your actual API key:
POST https://language.googleapis.com/v1/documents:
analyzeEntities?key=API_KEY
Wait for a response.
Now all that's left to do is wait for a response from the API. You can expect a status code that lets you know the request was either processed successfully or unsuccessfully. In the latter case, the status code will explain the issue so you can correct it and try again. The most common codes are 2XX codes ("success codes") and 4XX codes ("error codes"). Let's take a brief look at some of the most common:
* 200 OK: The request was successful.
* 201 Created: The resource has been created on the server. This response is typically returned for POST requests.
* 202 Accepted: The request has been received but is still being processed.
* 204 No Content: The request has been successfully processed but no content will be returned.2XX Codes
These codes convey that the server has received the client's request and processed it successfully.
Here are the most common examples:
4XX Codes
These codes convey that the client's request has an error. It's possible that the request is written incorrectly, or the resource which the client is requesting doesn't exist.
* 400 Bad Request: There is something wrong in the client's request.
* 401 Unauthorized: The client is not authorized to make this request.
* 403 Forbidden: The request is correct but can't be processed. Likely, the problem is that the client does not have required permissions.
* 404 Not Found: The resource being requested doesn't exist
Conclusion
There you have it! In summary, connecting a React frontend to an Express backend is simple. It just requires you to fetch data from the port that the backend server is located on. I didn't cover PUT or DELETE requests, but those are very similar to POST requests, so you can learn how to do those very easily with the knowledge I gave above. And I really recommend learning the MERN stack if you're not sure what full stack development stack to choose because MERN is extremely powerful once you learn how to connect React with Express. Anyways, thanks for reading.
 Printer Friendly Version